Chillan Nuevo & Nevados de Chillan
Access
Access to these mountains is easiest from Termas de Chillan ski resort. You have the option to “cheat” and take the Don Otto lift up, saving 700m of ascent, 2 hours and a fair bit of energy. You won’t be saving much from your wallet though. Monday to Thursday, the lift passes are cheaper at CLP 20000 per person, which in 2011 was about £28. Friday to Sunday, it was CLP 30000! There is no single lift option. When I enquired about this, I was told that I was supposed to get permission from the police, supply a route map, contact details (e.g. mobile number/VHF), have everything on their equipment list, and then we would be given permission from the ski centre to go up the volcanoes. Alternatively, you could do as we did, and simply buy a lift pass, get on the lift, and go for your tour!
Chillan Nuevo (and Chillan Viejo) are just above the ski resort, and would be quite doable in a day without the lift pass. If you buy a pass, you should be able to easily get down in time to have at least some use of it. Alternatively, have a few runs before setting off on your tour. Nevados de Chillan is a much bigger day, with more navigation required, and some ascents and descents on the way to the summit. I would recommend buying the pass for the first lift, and accepting that you won’t be back in time.
Chillan Nuevo - 3186m (and Viejo - 3122m)
In terms of the route to take, once at the top of the lift, follow the easy angled traversing piste for a couple of hundred metres, then just head to the col, and go left or right! The guidebook suggested travelling further on the piste, then following an obvious wide gully. There are many options, and none of them look like you'd end up in trouble. Once at the rim of the crater, we dumped the skis, and walked round the shattered ridge to the summit (on the left hand side as you approach the rim). Takes about 10 minutes from where you dump your skis. There is a metal summit marker, so you'll know you are there! Chillan Viejo was looking quite bare, so we didn't bother with it, but would be a short walk to the top.
Nevados de Chillan (3212m)
For Nevados de Chillan, it's more complicated. We left the top of the Don Otto lift, and followed the traversing piste for a few hundred metres where it joins a wide piste at a small wooden hut. From there, we headed uphill, but then had to do a short descent, so it would make sense to traverse round the small ridge below the hut to get into the wide easy angled gully. Follow the gully below the disused lift (bright orange towers), then the line of the next disused tow above. We headed in the direction of Nevados de Chillan a couple of hundred metres from the top of that lift. Initially, it's a long gradual ascent, heading towards the col. You will have to cross at only 2 channels if you get the line right by staying high enough. If you are lower, you may find an extra channel to cross, and the slopes to get out of them steeper. The first channel is the widest, and goes to the actual col. We took a diagonal descent into it (point 1 in the photo below), climbing out of it just below a cone which sits on the watershed. From there, it's barely 5 minutes to the second channel (point 2 in the photo below). The drop on the second channel is barely 15m.
You will be facing a big snow slope at this point. From there, traverse left across the steep snow slope and round the ridge to a large bowl. You will then see the foresummit of the volcano ahead across the wide bowl. You can go straight up the front of this slope if snow conditions allow (yellow route in the photo below), or essentially traverse, only slightly gaining your height to go around it on the left hand ridge. When we cross this left hand ridge, we gained about 50m too much height, and found ourselves on icy ground. The ridge itself was also bare, so we had to walk the 100m or so round it to get into a nice wide gully (point 3 in the photo below).
Head for the top of the gully, which is actually a low point in the rim of a snow covered crater. Skirt round to the left, avoiding the bumps on the crater rim (or go over them if you want), before heading up the steeper nose to the summit plateau. From there, it's a gradual ascent to the summit, which has a metal frame on the summit, and 2 book slots, one of which contained a frozen summit book (which was actually a notepad). You can return the same way, or if feeling adventurous, head straight down to Shangri-La, as our companions on the day did, and find some way of getting back to your vehicle!
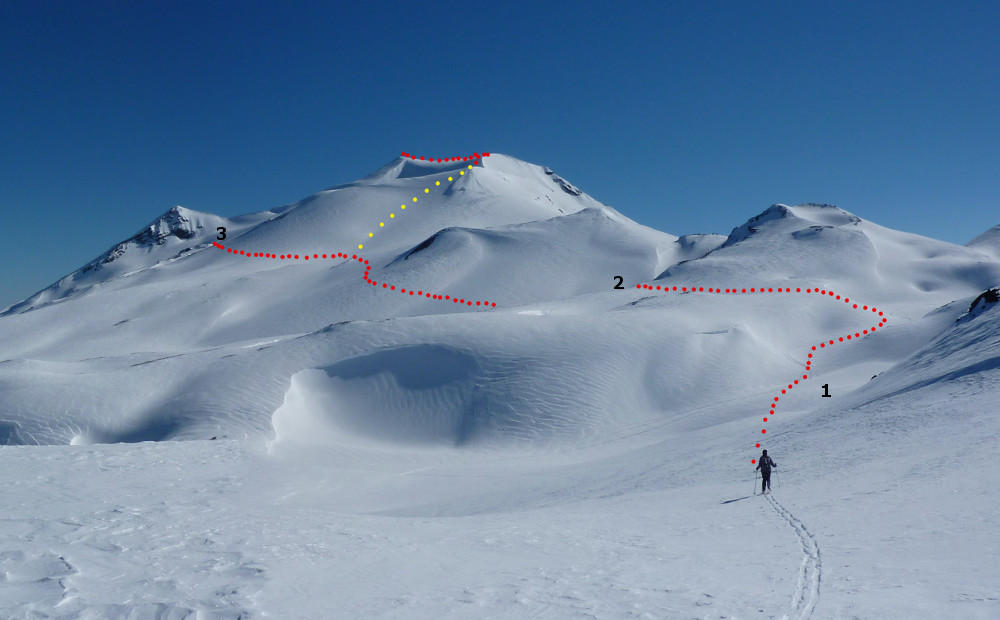
Between points 1 and 2 in the photo above, there is another gully which runs down the ridge. It's not as deep as the other 2, but if you take a high enough line like we did, you'll avoid an extra up and down.
Accommodation
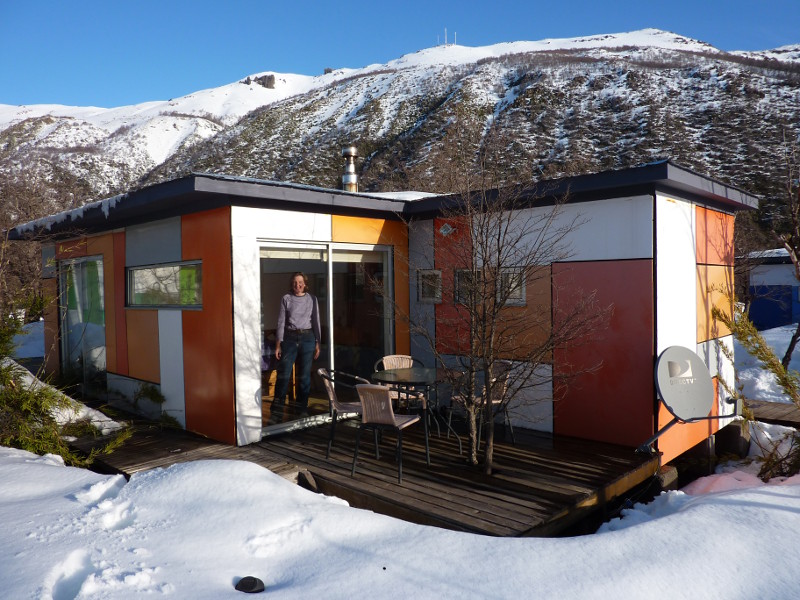
We stayed at Ecobox Andino in Las Trancas. Can't recommend it enough for very comfortable, self catered accommodation. The wood burner was always on when we got back from a day out. Rosa speaks some english, and is very enthusiastic about the area. When you enquire about prices, make sure you are quoted in US dollars, and ask for the price excluding IVA (the 19% tax that foreigners can avoid paying). It worked out about £80 a night for the 2 of us. Was worth it, given the journey to get there...